How to Season a Brand New Blackstone Griddle for the First Time
How to Season a Brand New Blackstone Griddle for the First Time
A Blackstone griddle is a fantastic tool for outdoor cooking, but to get the best performance out of your new griddle, it’s essential to season it properly before using it for the first time. Seasoning creates a non-stick surface, prevents rust, and enhances the durability of the griddle. This step-by-step guide will walk you through how to season your brand-new Blackstone griddle like a pro, ensuring it’s ready for grilling, frying, and everything in between.
Why is Seasoning Important?
Before diving into the process, it’s crucial to understand why seasoning a griddle is important. Seasoning creates a protective layer of oil on the surface of the griddle that bonds with the metal when heated. This results in a durable, non-stick coating that:
- Prevents rust: Seasoning forms a protective barrier against moisture.
- Creates a non-stick surface: Ensures that food doesn’t stick, making cooking and cleaning easier.
- Enhances flavor: Like a cast-iron skillet, a well-seasoned griddle will improve the taste of your food over time.
- Extends the griddle’s lifespan: Proper seasoning prevents wear and damage, keeping your griddle in top condition.
What You’ll Need to Season Your New Blackstone Griddle
Before you begin, gather the following materials:
- High smoke-point oil: Oils like flaxseed oil, canola oil, vegetable oil, or grapeseed oil are ideal for seasoning. Flaxseed oil is a popular choice because it creates a durable seasoning layer.
- Paper towels or a clean cloth: For applying and spreading the oil evenly.
- Tongs or heat-resistant gloves: To protect your hands from the heat during the seasoning process.
- Grill scraper or spatula: For cleaning and spreading oil.
Step-by-Step Guide to Seasoning a Brand New Blackstone Griddle
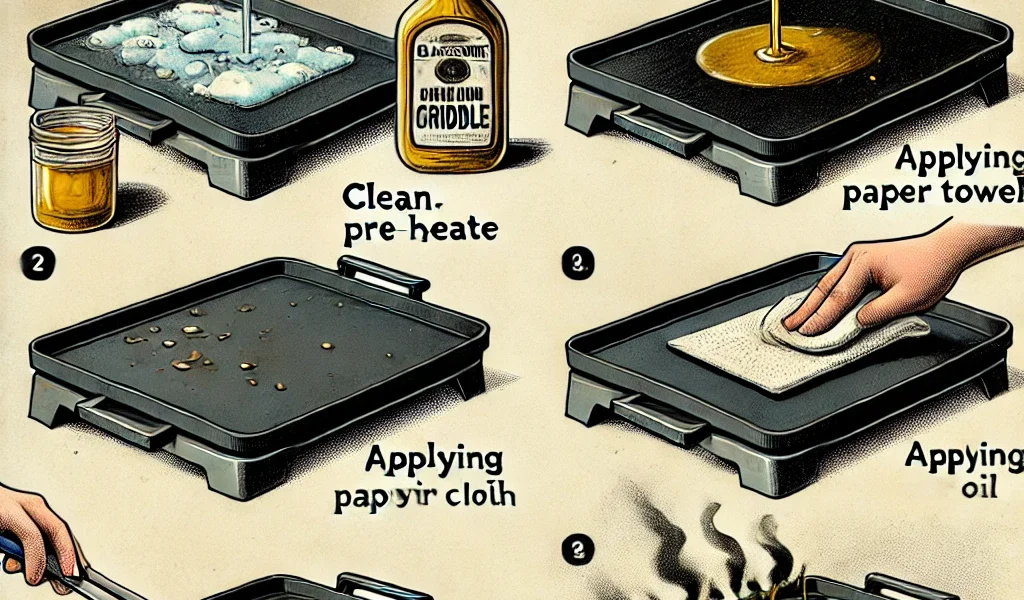
1. Initial Cleaning
Although your griddle is brand new, it’s important to clean off any residue or protective coating from the manufacturing process. Use warm, soapy water and a sponge to thoroughly wash the griddle. Rinse it well with clean water and let it air dry completely.
Important: This will be the only time you’ll ever use soap on your griddle. After seasoning, soap can strip away the protective layer you’ve worked hard to build.
2. Preheat the Griddle
Turn on your Blackstone griddle and set the heat to high. Let it preheat for 10-15 minutes. The surface will begin to darken, which is a sign that it’s ready for seasoning. Preheating is essential to open the metal’s pores so the oil can bond effectively.
3. Apply a Thin Layer of Oil
Once the griddle is hot, pour about 1-2 tablespoons of oil directly onto the surface. Using a pair of tongs with a paper towel or a clean cloth, spread the oil evenly over the entire cooking surface, including the sides and corners. Make sure to apply a very thin layer—using too much oil can result in a sticky surface.
Pro tip: Avoid using flavored oils like olive oil or butter, as these have lower smoke points and can leave behind unwanted residue.
4. Let the Oil Smoke
After applying the oil, let the griddle heat until the oil begins to smoke. This is called reaching the “smoke point,” where the oil starts to bond with the metal. As the oil smokes, it will gradually create a hard, black layer on the surface. Let it continue smoking for about 10-15 minutes, or until the smoke subsides.
5. Repeat the Process
After the first layer of oil has smoked off, it’s time to apply another layer. Turn off the griddle for a moment, then add another thin layer of oil, spreading it evenly just like before. Turn the griddle back on and let the second layer of oil smoke. Repeat this process 3-4 times to build a durable, non-stick seasoning layer.
Pro tip: The more layers of oil you apply, the better your seasoning will be. After a few rounds, your griddle should turn dark brown or black, which is a sign of good seasoning.
6. Cool and Store
Once you’ve completed the seasoning process with several layers of oil, turn off the griddle and let it cool down completely. Your griddle should now have a glossy, darkened surface that’s ready for cooking.
After each use, make sure to wipe down the griddle with a small amount of oil to maintain the seasoning and prevent rust.
Tips for Maintaining Your Seasoned Blackstone Griddle
- Reapply oil regularly: After each cooking session, apply a thin layer of oil to the griddle while it’s still warm to maintain the non-stick surface.
- Avoid acidic foods early on: Foods like tomatoes or citrus can break down the seasoning, especially when it’s still new. After several cooking sessions, the seasoning will become more durable and able to handle these foods.
- Clean without soap: Use a grill scraper or spatula to remove food particles, then wipe the griddle with a damp cloth. Avoid soap, as it can strip away the seasoning.
Troubleshooting Common Seasoning Issues
- Sticky surface: If your griddle feels sticky after seasoning, you likely applied too much oil at once. To fix this, heat the griddle again and scrape off the excess oil. Then, apply a thinner layer of oil and let it smoke off properly.
- Uneven seasoning: If certain areas of the griddle look patchy or uneven, it’s okay to go back and repeat the seasoning process in those spots. Make sure to spread the oil evenly across the entire surface each time.
- Rust spots: If rust appears, don’t panic. Scrape off the rust with a grill scraper, clean the area thoroughly, and apply a fresh layer of oil to reseason the griddle.
Conclusion
Seasoning your brand-new Blackstone griddle is an essential step to ensure it performs at its best for years to come. By following the steps outlined above, you’ll create a durable, non-stick surface that makes cooking a breeze and keeps your griddle in top condition. With proper care and maintenance, your Blackstone griddle will be ready to handle everything from delicate pancakes to sizzling steaks.
Now that your griddle is seasoned and ready to go, fire it up and enjoy the delicious meals you can create! Happy cooking!